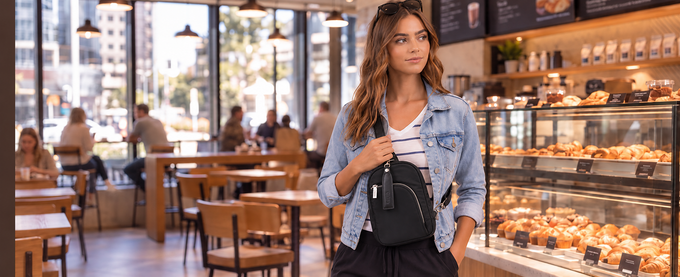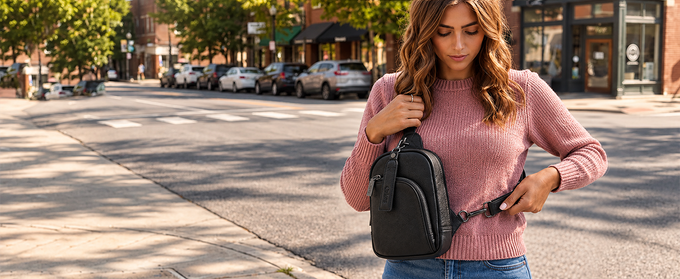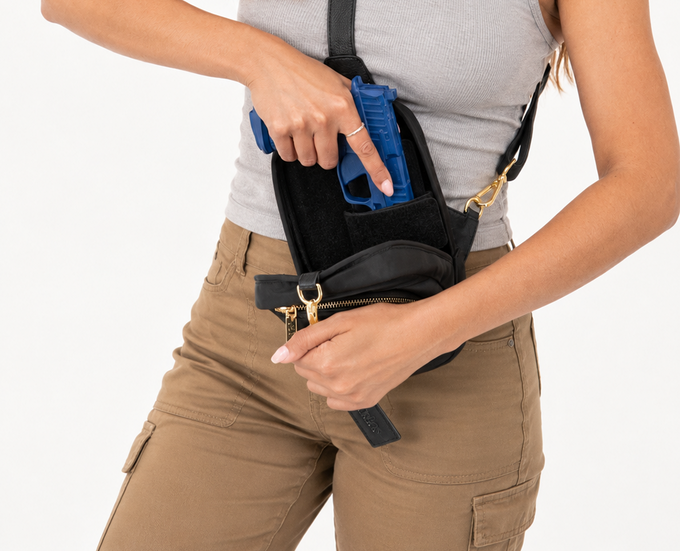

To learn how to draw from a concealed carry purse, work with an unloaded, verified-clear firearm and repeat one sequence: anchor the bag with your support hand, open the gun compartment, take a full grip with your finger off the trigger, lift the gun clear of the bag, then rotate the muzzle toward the target. Re-holster slowly.
Run every session the way a range coach runs a class: warm up, drill the draw, cool down, and stop before you get tired. A purse draw asks for 2 jobs a belt holster never does, steadying the bag and opening the compartment, and those jobs are where most errors hide.
One term before you start. Flagging is any moment the muzzle points at a person, and that includes you. In a purse draw, the body part most at risk is your support hand, because it holds the bag a few inches from where the gun comes out.
Warm Up: Clear Your Firearm and Your Space
Every session opens with the same warm-up: an empty gun, a room with no ammunition and a bag set up the way you wear it. Run it in this order each time with your unloaded firearm, so leaving a step out feels as wrong as driving without a seatbelt.
- Unload and check twice. Remove the magazine, lock the slide open, then look into the chamber and feel it with a fingertip. Repeat the whole check on your unloaded firearm before the first rep.
- Clear the room of ammunition. Loaded magazines, loose rounds in the bag's other pockets and anything in a jacket all leave the room, so nothing that fits the gun sits near your unloaded firearm.
- Pick a safe direction with a backstop. Choose a direction where a round would stop if every other rule failed. An exterior wall facing an empty yard beats an interior wall with a bedroom behind it.
- Close the door on distractions. Silence your phone and make sure no children, guests or pets can walk in halfway through a rep.
- Set a timer for 10 to 15 minutes. Short sessions keep attention high. Fatigue is when shortcuts start.
- Put the bag on exactly as you carry it. Same strap length, same side of the body, and the same outfit, if you can manage it.
Keep your finger straight along the frame for every rep, and treat your unloaded firearm as loaded even after 2 checks. The habit you build in a quiet room is the habit your hands will reach for on a busy sidewalk.
Confirm the bag fits the firearm
A gun that barely fits will bind on the way out and fight you on the way back in. The Does It Fit? tool applies 2 rules, quoted here exactly: "Firearm + Holster Length must be 0.5 in less than the bag's internal height." and "Frame Height + Optic must be at least 0.5 in shorter than the bag's internal width to allow clean draw and re-holstering."
You pick your make and model, and the tool fills in the length and frame height. Then it asks about your setup: on the tool, a Kydex holster adds 0.5 in to height, an optic adds 0.5 in to height, an extended magazine adds 1.5 in to height and a weapon-mounted light adds 1 in to length. Run that check once per firearm and again after any change to the setup.
Seat the holster and empty the compartment
Use a holster made for your exact model that fully covers the trigger guard, so nothing in the bag can reach the trigger. For bag-only carry, Cakes makes purse holster designed specifically for use inside a bag. The purse holster is made for bag use only, so it does not go on your body. If you want one holster that works both ways, the holster collection lists IWB Kydex holsters that you can wear on your body or use inside a bag. On the Madeline XL-M, the product page describes "Space for a holster along the inside back of the bag," which puts the gun on the side of the bag closest to your body.
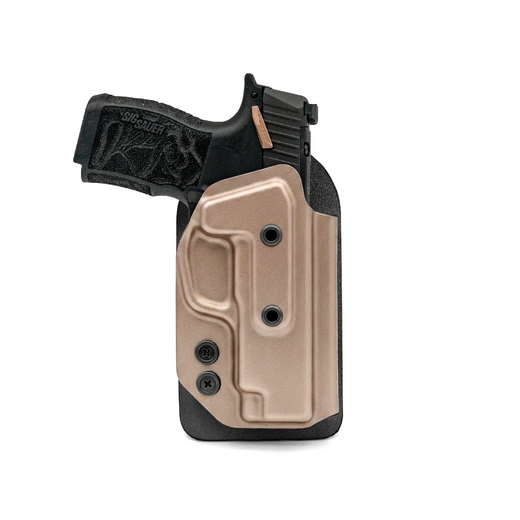
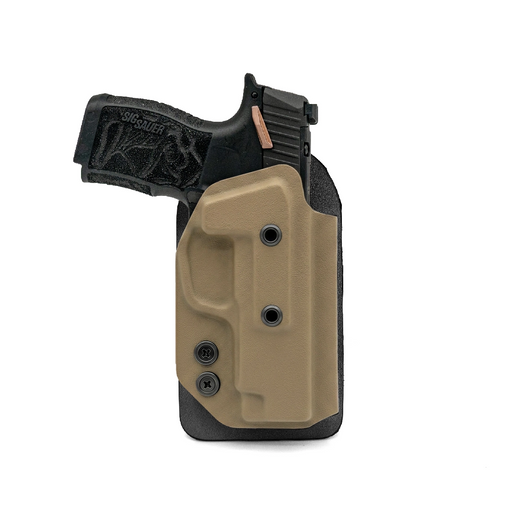
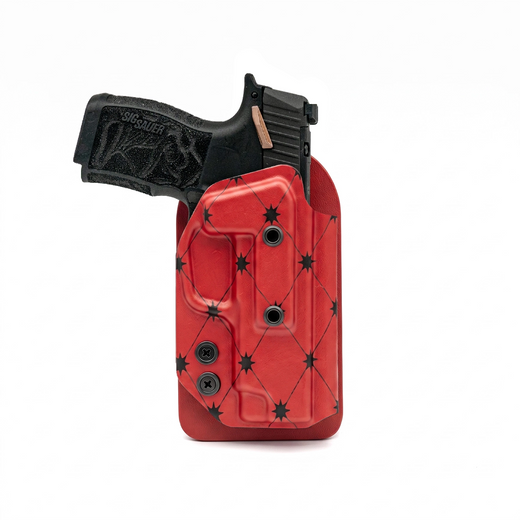
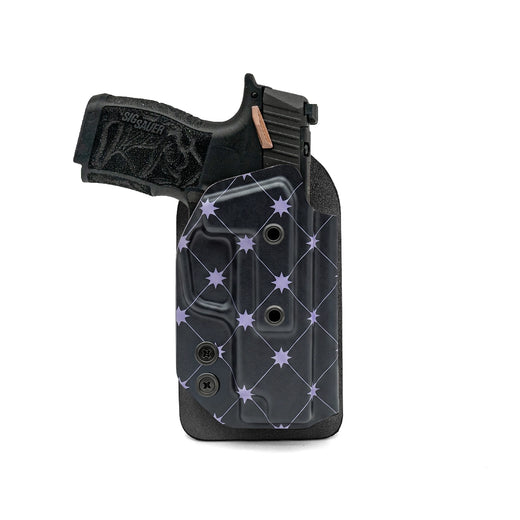
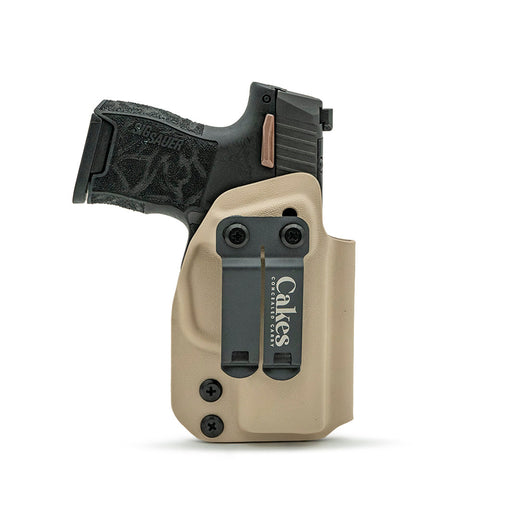


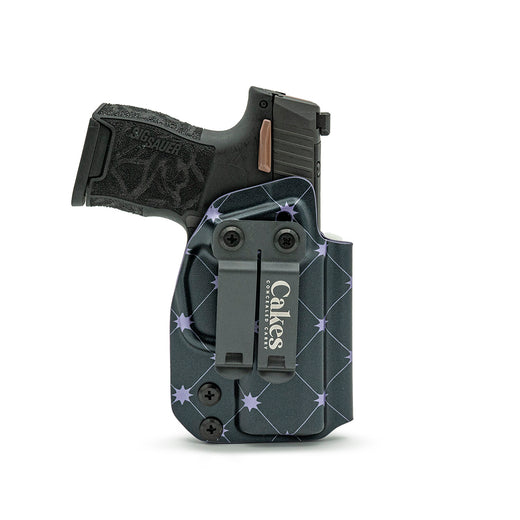
The gun compartment holds the holstered gun and nothing else. Keys, lipstick, pens and a phone can snag the grip, block the holster mouth or slide into the trigger guard as the gun goes back in. Check the compartment as part of every warm-up; it takes 5 seconds.
Set the strap height
Wear the strap across your body, not on one shoulder, and adjust it so the bag sits at or just above your hip. Too long and the bag swings away from your hand; too short and the compartment will not open cleanly. If the bag still moves when you walk fast or bend over, the Waist Belt for CCW Bags clips onto either D-ring on the sides of a Cakes bag and goes around your waist.
Find the pull tab by feel
Several Cakes bags open the gun compartment with a tab rather than a bare zipper. The Madeline Compact-M Leather CCW Bag describes a "magnetic closure and unique pull-tab" that "you simply pull down for immediate access," and the Millie Athletic XL-M Nylon CCW Bag lists "Magnetic pull tab access." Close your eyes and touch the tab 5 times before the first draw of the day.
| Bag or part | Material | How the gun compartment opens | Size or fit (as listed) |
|---|---|---|---|
| Madeline XL-M | 100% naturally milled cow hide leather | Tab attached to a magnetic closure | 6.6 in W x 9 in H x 2.16 in D |
| Madeline Compact-M Leather CCW Bag | 100% naturally milled cow hide leather | Magnetic closure and pull tab; pull down | 5.6 in W x 8 in H x 2.16 in D |
| Millie Athletic XL-M Nylon CCW Bag | Nylon | Magnetic pull tab access | 6.7 in x 9 in x 2 in |
| Unbranded Leather Pull Tabs for CCW | Full-grain leather | Swaps in for the original tab | Compatible with all Madeline bags |
Per the product pages as of October 2026. Check the product page for current details.


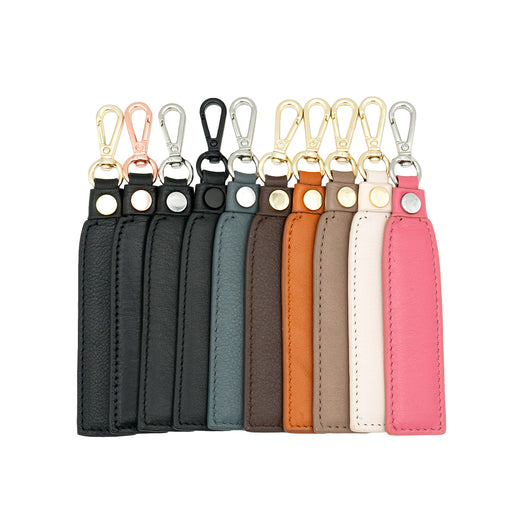
If you prefer a tab without a logo, the Unbranded Leather Pull Tabs for CCW page describes unbranded full-grain leather tabs that you can swap in for the original tab. After any swap, run 10 slow tab-and-grip reps with your unloaded firearm, because a new tab can sit in a slightly different spot under your fingers.
Drill the 8-Step Draw: How to Draw From a Concealed Carry Purse
The draw is the same 8 steps every time: anchor, open, grip, lift, clear, rotate, join and extend. Work each one slowly with your unloaded firearm until it feels automatic. Speed arrives on its own once the order never changes.
Each step below has 2 parts: what to do, then a Coach's cue, a short phrase you can say to yourself during the rep, plus the fault to watch for. Say the cues out loud for the first week of dry reps with your unloaded firearm; later they become silent.
Step 1: Anchor the bag with your support hand
Hold the bag steady so it cannot swing as the gun comes out. Grip it at a point that stays out of the muzzle's path, such as the strap above the bag or the far edge of the bag body, and never put your hand in front of the compartment opening.
Coach's cue: strap, not opening. Watch for: fingers curling over the top of the compartment, which puts them right where the muzzle will travel. Ask an instructor to watch where your support hand goes with your unloaded firearm, because this is where flagging happens most.
Step 2: Open the compartment
Pull the tab or zipper with your dominant hand in one firm motion. On a bag with a pull tab and magnetic closure, that usually means pulling down until the compartment releases. Your eyes stay up, on whatever made you reach.
Coach's cue: find it, pull it. Watch for: a 2-handed fumble, where the support hand lets go of the bag to help open it. Fix that with tab-only reps while your unloaded firearm stays holstered.
Step 3: Take a full firing grip in the holster
Get your full grip on the firearm while it is still seated in the holster: web of the hand high on the backstrap, fingers wrapped, trigger finger straight along the frame outside the trigger guard. A good grip here saves you from adjusting later, when the muzzle is already moving.
Coach's cue: high and full. Watch for: a fingertip grip that only pinches the top of the gun. If the compartment is too tight for a full grip, go back to the fit check before you add more reps.
Step 4: Lift the firearm straight out
Pull the gun up out of the holster along its own line, without twisting or levering it against the bag. If the bag lifts with it, your anchor needs work or the holster is not fixed in place. Your finger stays straight along the frame.
Coach's cue: straight up. Watch for: the holster coming out with the gun. A holster that travels is a setup problem, and no amount of repetition will fix it until the holster is seated again.
Step 5: Clear the bag
Keep lifting until the muzzle is fully out of the bag opening. Rotating too early is how the muzzle catches on the bag lip or sweeps across your support hand, so this step is a pause point: clear first, turn second.
Coach's cue: clear. Think the word before you turn the gun. Watch for: a muzzle that starts tipping forward while it is still inside the bag.
Step 6: Rotate the muzzle toward the target
Once the gun is clear, rotate the muzzle toward the target, which in a home session is your safe direction with its backstop. The muzzle should never point at your own body, your support arm or anyone nearby during this turn.
Coach's cue: muzzle out. Watch for: the turn passing across your stomach or legs, which happens most often in a seated draw. Slow the rotation down until a mirror shows a clean path.
Step 7: Bring the support hand to the gun
Release the bag and bring your support hand to the grip only after the muzzle points downrange. Joining hands too early, while the muzzle is still near the bag, is the most common way people flag themselves during a purse draw.
Coach's cue: gun out, then hands meet. Watch for: the support hand leaving the bag and sliding toward the muzzle on its way to the grip. It should travel behind the gun, never in front of it.
Step 8: Extend to the target with your finger off the trigger
Press the firearm out toward the target and find your sights. In this session, every rep ends here with your finger still straight along the frame. Trigger work is a separate skill; build it with your unloaded firearm under an instructor's guidance, and confirm it with live fire only under a qualified instructor.
Hold that position for a second, scan left and right, then bring the gun back to a ready position, muzzle down and toward your safe direction. That is 1 full rep. Coach's cue: press, sights, scan. Watch for: the finger drifting onto the trigger as the arms extend.
Cool Down: Re-Holster and Unload Your Routine
Re-holstering is the slowest part of the session on purpose. Speed belongs to the draw; the re-holster belongs to patience, because there is never a reason to hurry a gun back into a bag.
- Get your finger out and up. Before the muzzle goes near the bag, move your trigger finger high onto the frame, well away from the trigger guard.
- Look the gun in. Glance at the holster mouth and make sure nothing, including a strap, a tab or the bag lining, is inside it.
- Keep the support hand clear. Hold the bag from the outside edge or the strap, never across the opening.
- Seat it slowly. Lower the gun into the holster until it seats fully. If it binds, stop, lift it out and look again; do not push.
- Close the compartment. Close the tab or zipper and confirm the closure has seated before you move.
Many experienced carriers take the whole bag off and re-holster with the bag on a table, muzzle pointed in a safe direction. That takes the support hand out of the picture entirely. Try both methods with your unloaded firearm and an instructor, and keep the one you can do correctly every time.
Close the session out loud
When the timer ends, say out loud that practice is over. That spoken line marks a clean break between practice mode and carry mode, so a tired hand never runs "one more rep" after the gun is loaded. Then put your unloaded firearm away or reload it in a deliberate way, outside the practice area, with the muzzle in a safe direction.
Write down 3 things
Before you put the notebook away, record the date, how many clean reps you ran with your unloaded firearm, and the one fault that showed up most. Next session, that fault becomes the warm-up focus. A short log turns scattered dry reps into a plan you can see.
Progress Over 4 Weeks
A short, regular schedule beats a long session once a month. This plan uses your unloaded firearm for every rep and builds from grip-only work to full draws in your everyday clothes, then hands off to an instructor for live fire.
| Week | Focus (dry, with your unloaded firearm) | Suggested reps | Goal |
|---|---|---|---|
| 1 | Find the tab by feel, open the compartment and take a grip without drawing | 10 slow reps, 3 sessions | Reach and grip without looking |
| 2 | Full 8-step draw to the target, then a slow re-holster | 10 slow reps, 3 sessions | Support hand stays out of the muzzle path |
| 3 | Draw while standing, seated and walking a few steps | 10 reps per position, 2 sessions | Bag position works in real life |
| 4 | Repeat in the outfits you wear most, then book live fire | 10 reps per outfit, plus 1 instructor session | Confirm the skill under supervision |
Practice plan as of October 2026. Rep counts are a suggested starting point, not a published standard; every rep uses your unloaded firearm.
Move to the next week only when you can run 10 clean reps in a row at the current level with your unloaded firearm. A clean rep means the support hand stayed out of the muzzle path, the finger stayed off the trigger and the re-holster was slow and visual. If that takes 2 weeks instead of 1, the plan is working.
Some readers search for concealed carry purse draw practice hoping for a single magic drill. There is not one. What works is repetition of the full sequence with your unloaded firearm, a few times a week, in the clothes and positions you actually live in.
If a rep goes wrong (the bag swings, the tab is missed, the muzzle drifts toward your hand), stop, reset and run the next one slower with your unloaded firearm. Slow, correct reps add up; fast, sloppy ones teach your hands the wrong pattern.
Add These Drills When the Basics Are Smooth
Once week 2 feels easy, add purse carry training drills that isolate one piece of the draw at a time. Each uses your unloaded firearm and the same warm-up as every other session.
| Drill | What you do (with your unloaded firearm) | Reps | What to watch |
|---|---|---|---|
| Tab-find drill | Eyes up, reach and open the compartment by feel, then close it | 10 | Hand finds the tab on the first try |
| Grip-only drill | Open, take a full grip in the holster, release, close | 10 | Same grip every time; finger straight |
| Support-hand check | Full draw in front of a mirror, pausing at Step 6 | 5 | Muzzle never crosses your support hand |
| Seated draw | Draw from a chair, bag on your lap or at your hip | 5 per setup | Bag stays put; muzzle stays off your legs |
| Walking draw | Take 3 steps, stop, then draw | 5 | Bag has not swung away from your hand |
| Re-holster drill | Slow re-holster only, bag worn and then on a table | 10 | You look the gun in every time |
| Outfit check | Full draw wearing a jacket, then a coat, then a dress | 3 per outfit | Clothing does not block the tab |
Drills as of October 2026. Rep counts are a suggested starting point; run each drill in a room with no ammunition, muzzle toward a safe backstop.
Pick 2 or 3 drills per session rather than all 7. Rotating them keeps your attention on the detail each drill is built to catch, and it keeps each dry session with your unloaded firearm inside the 10 to 15 minute window.
To measure progress, film a few reps on your phone and watch the support hand and the muzzle in slow motion. Add a timer only after the motion is correct, and treat your time as a personal baseline rather than a goal, because work with your unloaded firearm is about consistency before speed.
Switching shoulders changes every rep. If you plan to move the bag to the other side for a different outfit, run the grip-only and support-hand drills from that side with your unloaded firearm before you carry that way.
Know When to Bring in an Instructor
Dry reps with your unloaded firearm build the motion; a qualified instructor confirms it and is the only right setting for live fire. Book a session when any of these is true.
- You can run all 8 steps cleanly with your unloaded firearm, 10 reps in a row.
- Your support hand keeps drifting toward the opening, and filming your unloaded reps has not fixed it.
- You changed bags, holsters or firearms and want the new setup watched before you carry it.
- You are ready for live fire, which belongs on a range with a qualified instructor present.
An instructor can see things you cannot, especially where your support hand goes and how close the muzzle comes to your body as it clears the bag. Ask whether they have taught off-body carry before, and bring the exact bag, holster and outfit you plan to carry.
The Cakes instructor directory searches by zip code and returns firearms instructors within 200 miles. The page says Cakes Certified instructors are vetted and certified by the Cakes team, and they appear first; community instructors are listed too. National organizations such as USCCA and NRA also list classes.
For more reading, the Cakes Education Series page and our post Training the Draw: Why Practice Matters as Much as the Gear cover safe draw and the habit of regular reps with your unloaded firearm.
A note on why this page exists. Cakes sells bags, and a bag is only as safe as the hands using it. Teaching the skill is part of what we make, and whether you buy anything is not how we judge this page.
Put the Firearm Away the Right Way
When the bag comes off your body or out of your hand, the firearm moves into a locked container or safe. That transfer is part of the session and part of every arrival home, especially in a house with children, visitors or roommates.
Children reach for purses because that is where snacks, phones and keys live. A bag on a chair, a couch or a car seat is within reach of anyone who picks it up. Put a lockbox or gun safe where you set your bag down, and move the firearm the moment the strap comes off, the same way you hang up your keys.
Store ammunition separately from the gun when it is not being carried. After a session, your unloaded firearm still goes into locked storage; the empty chamber is not a storage method.
Project ChildSafe, which the National Shooting Sports Foundation runs, makes free gun locks and safety kits available along with storage guidance for families. A free cable lock is a sensible backup for the times you are away from your safe.
Check the Law Before You Practice Anywhere New
Carry and storage laws vary by state and change often, so confirm the current rules before you carry a firearm in any bag or train in a new place. This section is general information, not legal advice.
States and venues can regulate whether you need a permit, where you may carry, and how a firearm must be stored in a vehicle. Schools, government buildings, airports and private businesses may each set their own rules, and ranges publish their own policies on holster draws.
Accuracy note: check your current state law and any local rules before you carry, check a range's draw policy before you book, and ask a qualified instructor about your state's specifics. When you travel, check the state law where you are going, not only where you live.
FAQ: Drawing From a Concealed Carry Purse
How long does it take to learn to draw from a concealed carry purse?
Most people can learn the basic sequence in a few short sessions, but smooth, consistent reps take weeks. A 4-week plan of brief dry sessions with your unloaded firearm, about 3 times a week, followed by live fire under a qualified instructor, is a sensible starting point for most new purse carriers.
Where should my support hand go during a purse draw?
Anchor the bag at a point that stays out of the muzzle's path, such as the strap above the bag or its far edge. Never hold the bag in front of the compartment opening. Bring the support hand to the gun only after the muzzle points at the target, and have an instructor check your position.
Can I train my purse draw at home?
Yes, as dry practice with your unloaded firearm. Remove all ammunition from the room, check the chamber twice, choose a safe direction with a solid backstop, keep your finger off the trigger and re-holster slowly. Keep sessions short, and save any live-fire work for a range with a qualified instructor present.
Is it legal to carry a handgun in a purse?
It depends on where you live and where you go. States set their own permit, carry and vehicle storage rules, and many venues add restrictions. Check your current state law and local rules before carrying, and ask a qualified instructor about your state. This answer is general information, not legal advice.
Book a Session
Once you can run the 8 steps with your unloaded firearm, find a session near you in the instructor directory.